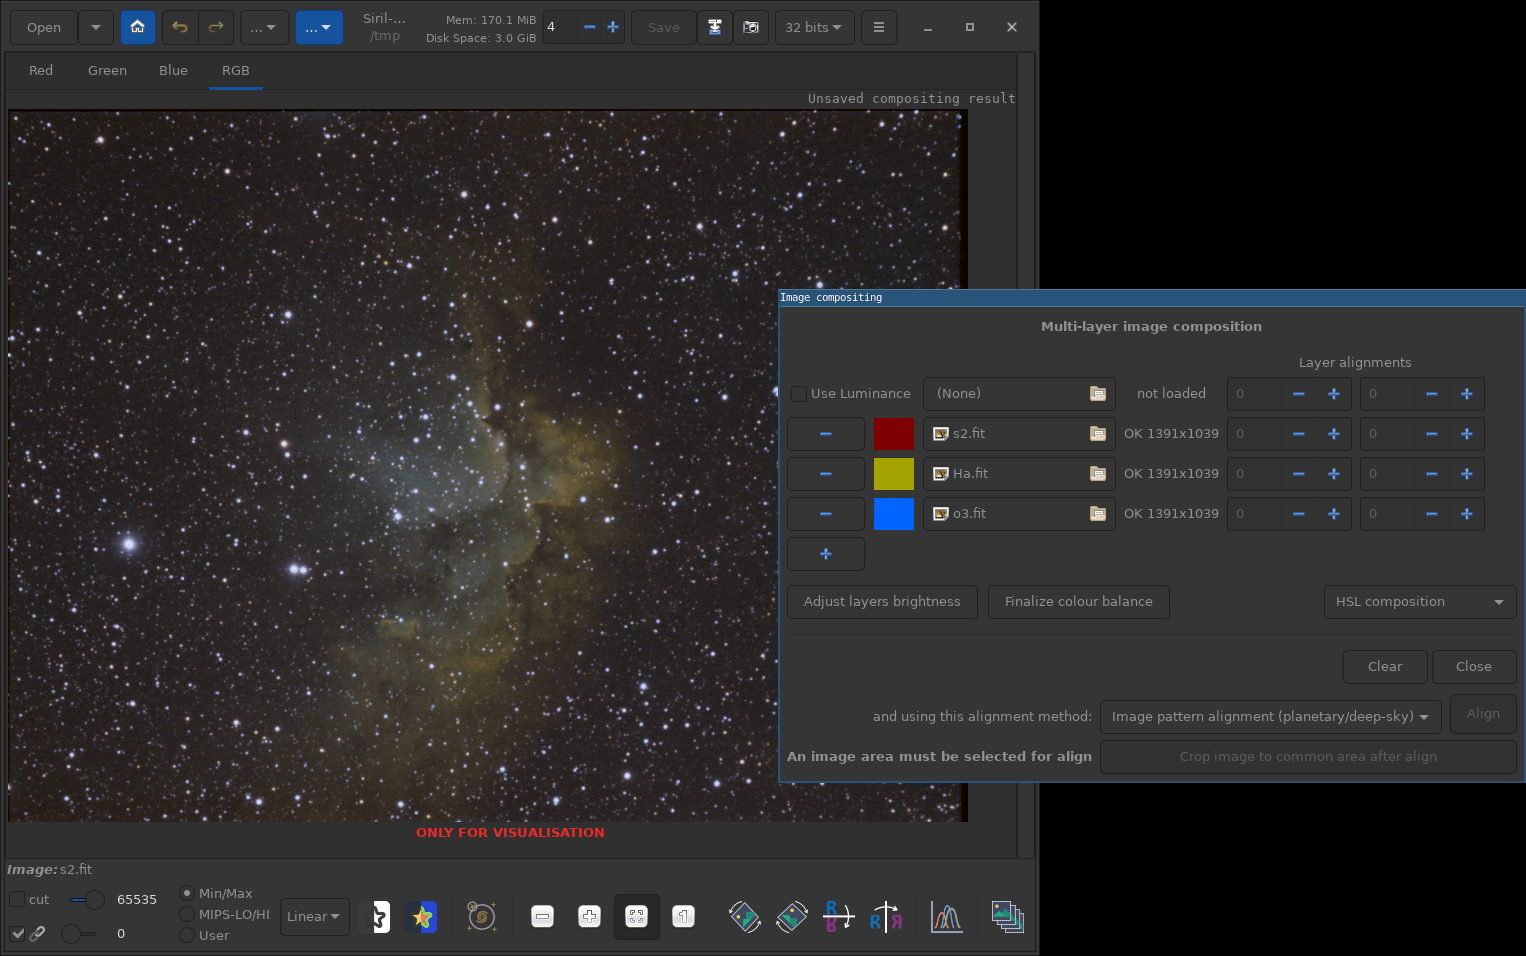
RGB composition
Whether they come from a monochrome camera or a color camera with dual-band filters, creating a color image from a set of monochrome stacks is always a challenge. Many combinations are possible and there are specificities in the processing of each of them. In this tutorial we will go over the basics and discover the tools that Siril provides to make any color composition you like.
This tutorial expands from its previous version to show the capabilities of Siril 1.2. Instead of relying purely on the graphical RGB composition tool, we now have two alternatives: Pixel Math and scripts.
- The RGB composition tool is a graphical tool that can take up to 8 images in input for complex color compositions. Each image can be assigned a color it will take in the result image, making the composition both easy in terms of creativity and extremely difficult to manage in terms of color balance. Also, it does not allow images to be registered with rotation or equalized from its interface, so this has to be done separately beforehand.
- Pixel Math is also a graphical tool capable of taking as many input images as needed, but combines them with math, statistics and 2-image operators. It can control very easily how colors are mixed, provides a preview, but does not feature registration operations.
- Since version 1.2, all image processing functions are available as commands , meaning they can be used in scripts , including simplified Pixel Math operations and RGB or LRGB combinations. This method does not have a graphical user interface, so it should either be used for simple compositions or to reproduce compositions previously made with the two other tools.
Preparing the images #
Before combining the monochrome images into a color image, two operations often need to be done: registering them and equalizing their levels.
1. Registering images #
The RGB Composition tool is able to realign the loaded images but only with basic shift-only registration methods : one-star registration and image pattern (DFT) registration. Shift-only alignment at this level is a big limitation because it’s rare that stars will be aligned on each four corners. Moreover, the tool does not allow image borders that are not available from all input images to be cropped, and does not allow images taken with different sensors to be used together, for example a luminance from a mono camera and a color from a completely different color camera. It is however capable of scaling the input images to match their binning, if they otherwise have the same sampling.
To overcome these limitations, and for the two other tools anyway, using a 2-pass global star registration with a common-area framing is recommended. The problem is that it normally runs on a sequence of images, not on files with different names, so it requires many manual operations to be done: creating a new directory, renaming or converting images, registrering and renaming the results…
Fortunately, with 1.2 we published a script that registers and combines three
monochrome images, called RGB_composition.ssf. To use it, in an empty
directory, copy the monochrome stacks and name them R, G, B with the configured
FITS file extension (.fit by default). Run the script, it will register and
reframe them to the common area, and create a color image (named rgb.fit) with
the three images. Putting more files in the directory will still align them all,
the color image can simply be discarded. The registered images will be named
r_colors_00001.fit and other numbers, in the same order as the input
alphabetical order.
Warning: if all images do not have the same sampling, if they have different binning settings or were taken with different cameras, the minimum framing mode of the new automatic registration may not keep images to the largest image dimensions. It will depend on which image is the reference image of the sequence, and manual intervention may be required to set it right .
Case of a mono AND a color image: while it is possible to assemble a monochrome luminance and a color image with the new tool as we will see below, it is still not yet possible to register them together, or register channels within a single color image. To do this, a channels extraction is required, either from the GUI or using the split command .
2. Equalizing image levels #
A common problem with color compositions is that some images have much more signal than others, and sometimes very different backgrounds levels too. Using them directly will make white balance and color balance nearly impossible to manage in some cases, although correcting only the background levels is an easy thing to do after combination to a color image (with the color calibration tool ).
We assume that at this stage images had their background gradient removed , either during preprocessing on calibrated individual frames or on the stacks.
There are many ways in Siril to equalize the levels of monochrome images, each with pros and cons, some applying only to specific kinds of images. Experimenting with them is probably the best way to see what you prefer. Creating a color image is very subjective and personal.
2.1. Use linear match #
This technique works only with registered images. It consists in finding a factor that will minimize pixel value differences between the image and a reference image. Choose the reference image with a background, nebula and star level that look alright.
In Siril, this is available both in the GUI (see its documentation
too
) and with
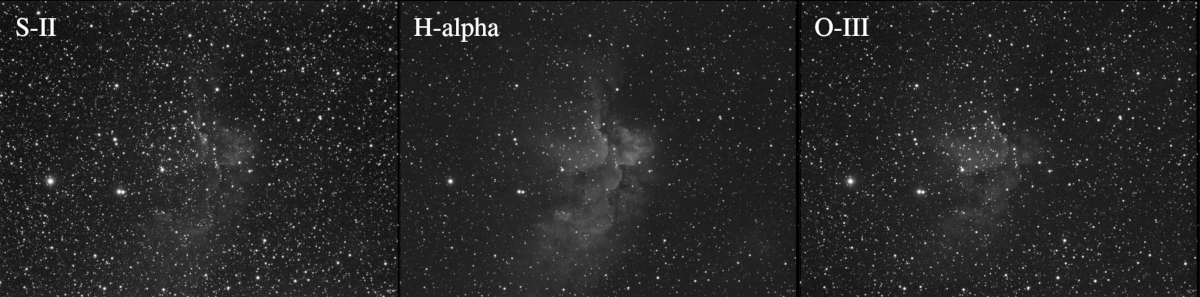
the The input imageslinear_match command. Here is how to use it from the graphical tool,
illustrated with these input images:
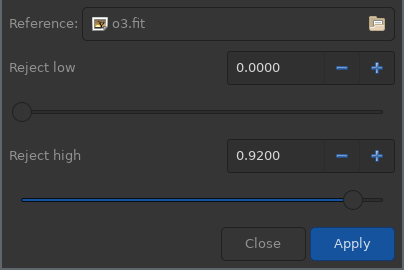
First, open one image to match against the reference. Open the linear match
tool, found in the Image processing menu near the bottom of the list. Browse
to the reference image that you chose by clicking on the button at the top of
the window. Then click on Apply, you should see a change in the image.
Close the window and save the image. Note that using the save button or
shortcut will overwrite the input image, there is also a Save as button right
to the Save button if you want to change the name of the modified image.
The linear match tool window, with the O-III image selected as reference
Do the same for all input images except the reference image, don’t
forget to save all of them before opening a new one. Here is an example result:
The linear-matched images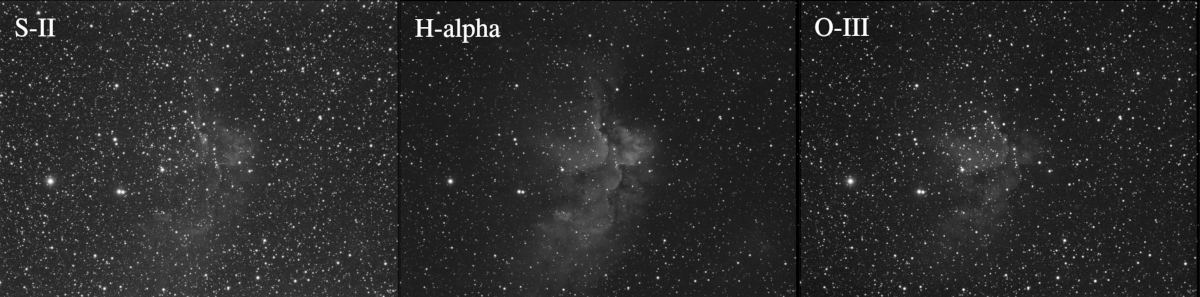
We can see that the background is even more different, but the important part is that the nebulae are of similar level in the three images. The background balance can easily be corrected after the colour composition.
2.2 Use Pixel Math #
Image normalization used during stacking would be very good for this task. It could actually be used in Sequence Export , but the same problem as with manual registration appear: file manipulation and tracking. For simplicity, its behavior can be replicated using Pixel Math . As for the linear match method, it’s important to choose a reference image with levels we want to put the others at.
Pixel math can mix together or modify several monochrome or color images using math formulas, image statistics and even image operators. A typical use case for this tool is to create a synthetic channel, like luminance or red, from several images, like Red and H-Alpha, as shown in its tutorial . But given the correct formulas, it can also adjust image level.
Put this formula to normalize an image against the reference, the reference
being named ref and the image to normalize image here, the normalized image
will be called image2 (adapt to your needs and do for all images):
pm "$image$*mad($ref$)/mad($image$)-mad($ref$)/mad($image$)*median($image$)+median($ref$)"
save image2
It is also possible to enter this formula directly during the color composition as seen on the picture below, but it becomes less easy to control the color balance and other mixing effects.
Normalization of images directly within Pixel Math
2.3 Use unlinked-channel autostretch #
Siril 1.2 added the capability to unlink channels in the autostrech operation, and added the autostretch command . Autostretch stretches the histogram to make the peak a given width and moves it to a specified location (parameters are usually automatic). If the same parameters are used for all channels, it can align their histograms pretty well, which is a level equalization function. The limitation is that it only works with a color image, so only three filters after color combination, and does not keep the images linear, or acts as a pre-stretch.
The amount of stretching can be lowered a lot, but only from the command, to not have counterproductive effects on the remaining of the image processing. We indeed recommend using the new Generalised Hyperbolic Stretch (GHS ) histogram transformation instead of the classic Histogram Transformation tool as it offers more control, but it works better with a pre-stretch.
2.4 Use Photometric Color Correction #
Also limited to one type of image (3-channels and with filters red, green and blue, linear pixel values), this method is very reliable if there are enough non-saturated stars and if there is no obvious unnatural gradient on the images. The PCC applies a factor to each channel to match expected star colors as close as possible and realigns backgrounds, possibly in a selected area, to have a neutral gray.
As it runs on color images, this type of equalization happens after color recombination, and as it analyses star color, the different channels must be well aligned.
Creating the color image #
Once all images have the same framing and alignment, and optionally their levels equalized, comes the time to create a color image. It is generally quite simple when there are only 3 input images, like for SHO or RGB combinations, but becomes quite tricky when an image is used as Luminance and the others are used to color it, or when there are not 3 images.
The basic rule for Luminance-based composition is that the input images should already have been stretched. Linear images that are very dark will not give much color to the result image otherwise.
Another important concern is to think about how monochrome input image will color the result image. With 3 input images, it’s generally as simple as assigning one to the destination red, green and blue channels. But with 2 or more than 3 images, some duplication or mixing will be required. For example, with 4 images made with filters R, G, B, Ha, how to get a color image? Many answers are possible… Do you want realistic colors? In that case, H-Alpha is supposed to be red. Or do you want to bring out more details provided by the H-Alpha? In that case, maybe creating a synthetic luminance from a mix of H-Alpha and green may be a good idea…
The next sections will present the three tools provided by Siril to make these colors mixing and creating a color image.
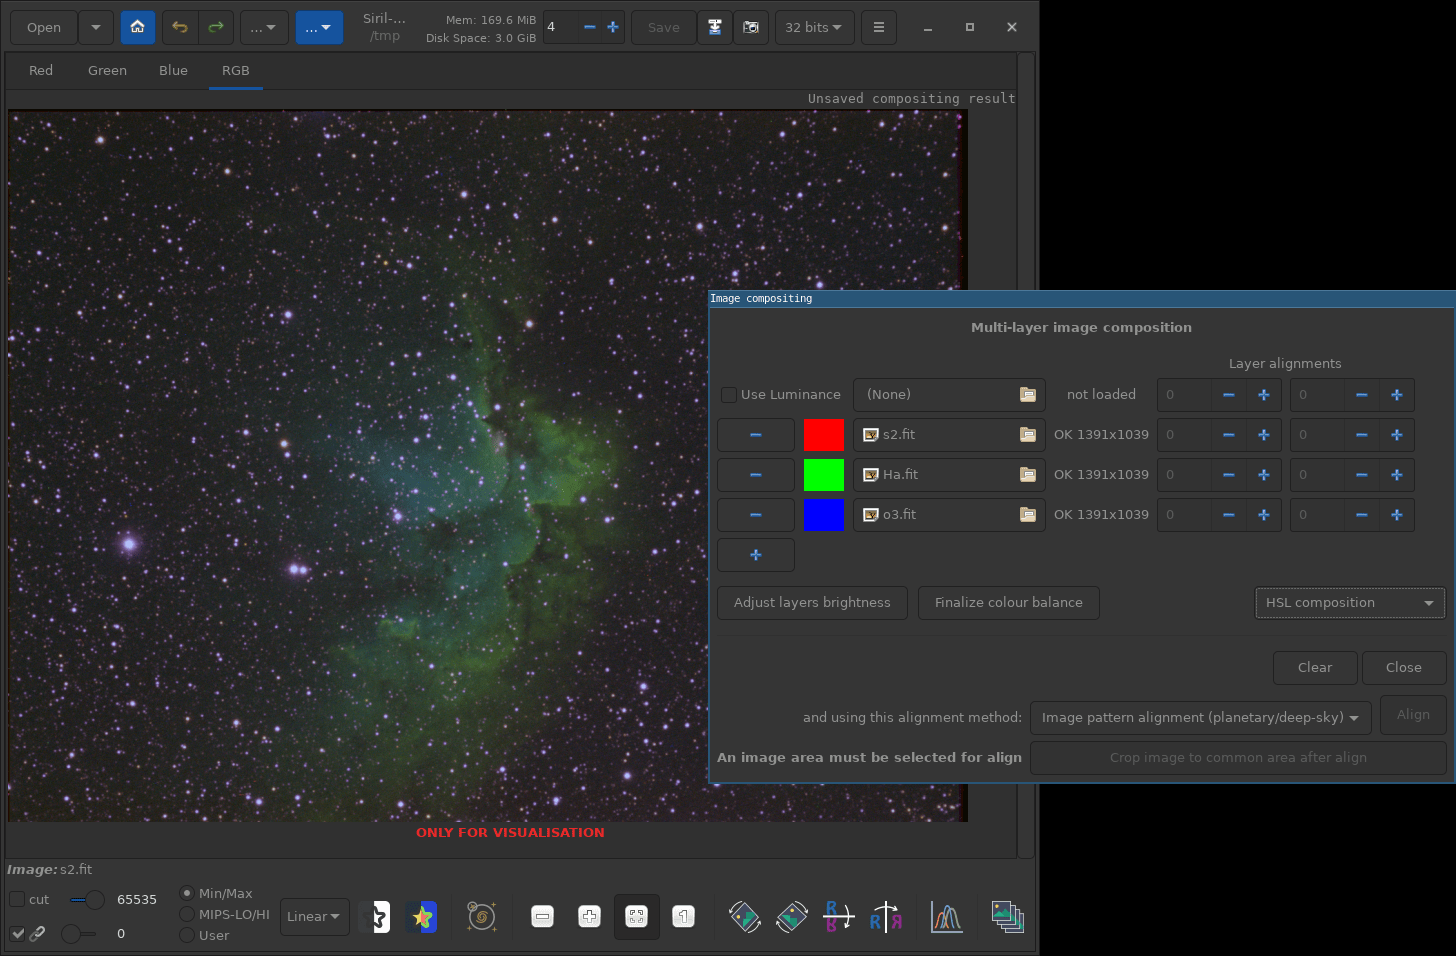
1. Using the RGB Composition tool #
The RGB composition tool
can be accessed in the last entries of the Image processing menu. Each line
of the top part, where not loaded is written, will represent one input image.
Each of them will be assigned a color that will make it contribute to the final
color image with a tint.
Load one of the images by clicking on the browsing button, left of the not loaded label. It can be any of the images, as we will be able to reassign them
a target color later. Note that the first line is used in case there is a
luminance image in the set, just don’t load one here if you don’t plan to use
luminance in the composition.
Do the same for the other images. To make new line appear if needed, click on
the big The RGB composition tool with the three images loaded+ button on the left. In our case, we have just three images and we
have loaded them in the order of the Hubble palette (S, H, O assigned to R, G,
B):
Note for binning and image dimensions: the first loaded image determines the size of the output image. If you have images of different sizes, you should load the largest first. If your images are different just because of bining, so with the same field of view, the composition tool will upscale the smaller images when they are loaded to match the size of the first loaded image. It is useful for the common L-RGB taken with the color filters in bin 2. If two images have not been taken with the same sensor, a preliminary registration should be done, see the beginning of this tutorial.
Shift-only alignment #
It is possible to align the images from this tool, by selecting a star and
clicking on the Align button after having chosen the one-star alignment mode.
This will not correct rotation between images as previously explained but it
can be enough for some images or for a quick preview. Aligning on a single star
can show misalignment on corners of the image, in that case a global star
registration should be use before using this tool, see the beginning of the
tutorial.
Choosing colors for each image #
Now the hard task of choosing a color that fits each image begins. If you have
loaded your images in a random order or if you just don’t like the result, you
can change the color assigned to each input image. Click on the colored box on
the left of each line, this will open a color chooser.
The color selector appears when clicking on a colored box from the RGB composition window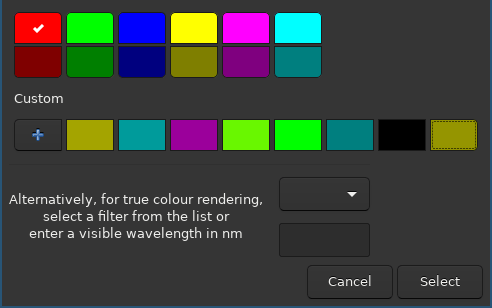
There are 12 predefined colors in it: red, green, blue, cyan (a mix of blue and green), magenta (a mix of red and blue) and yellow (a mix of red and green). Those 6 are duplicated to their 50% darker version too.
When selecing the bright version of these colors, for example the bright red, the associated image will be copied as the red channel of the output image. If several input images need to contribute to the red channel of the output image, then it will be wise to not make them all 100% red, otherwise the result’s red channel will be too bright and will overflow on stars or other high value pixels. For example, composing a R, G, B and H-Alpha images with the H-Alpha assigned to the red will require a mix between the red filter image and the H-Alpha filter image for the red channel of the output image. It can be done simply 50%-50% by selecting the half-power red in this window for these two images.
To illustrate this, I chose here the full cyan, full magenta and full yellow
for our three images, so each of the color channels of the output image (red,
green and blue) have two contributing input images at full power. The result is
too bright, stars are saturated.
An alternate but too bright coloring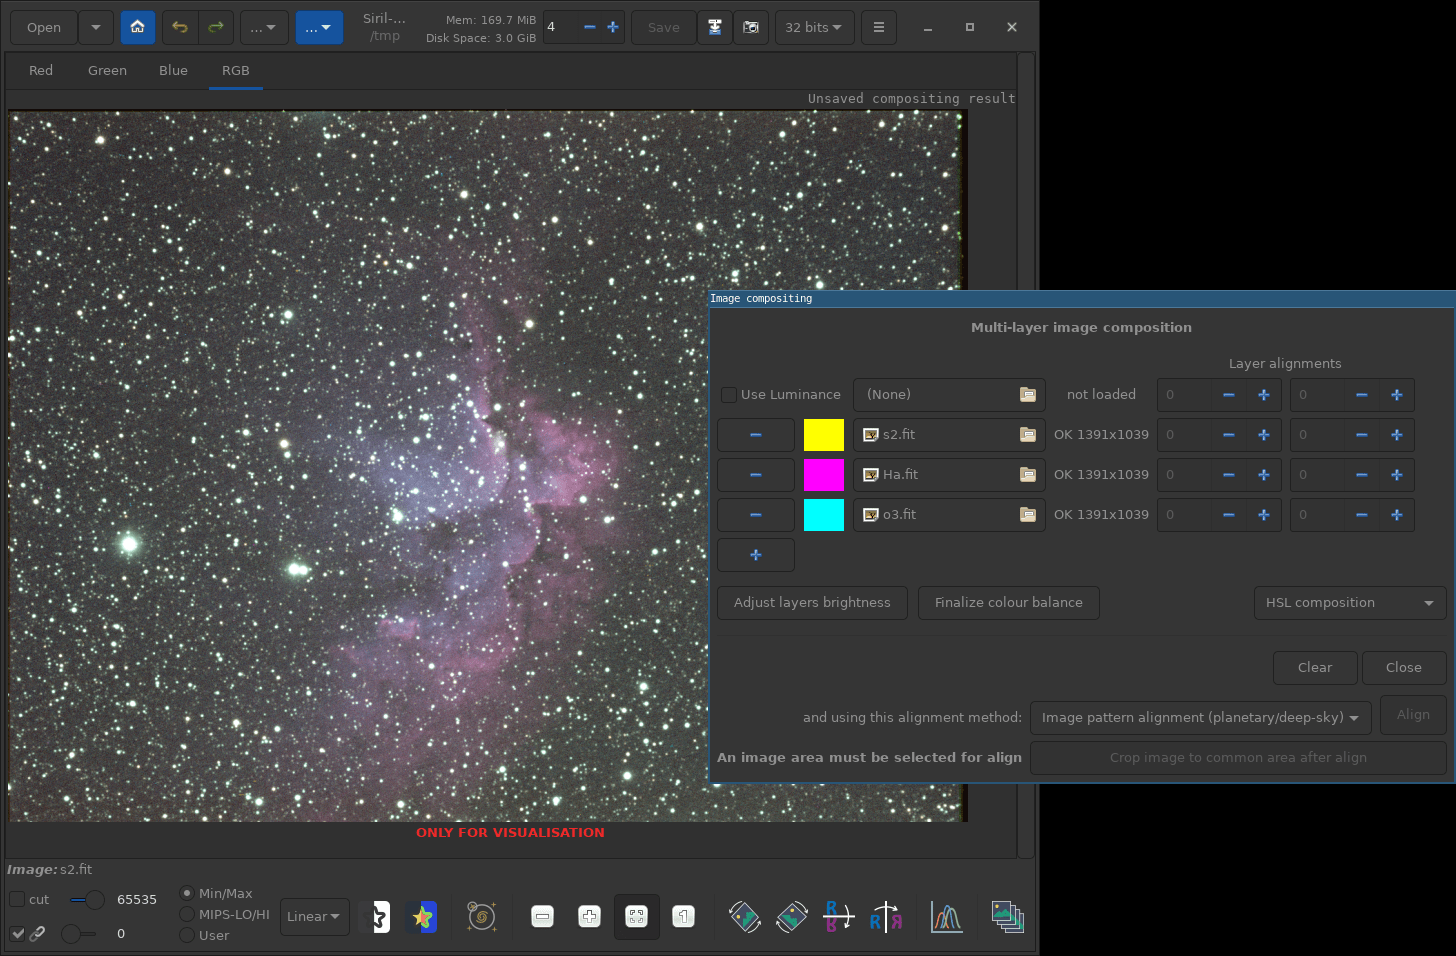
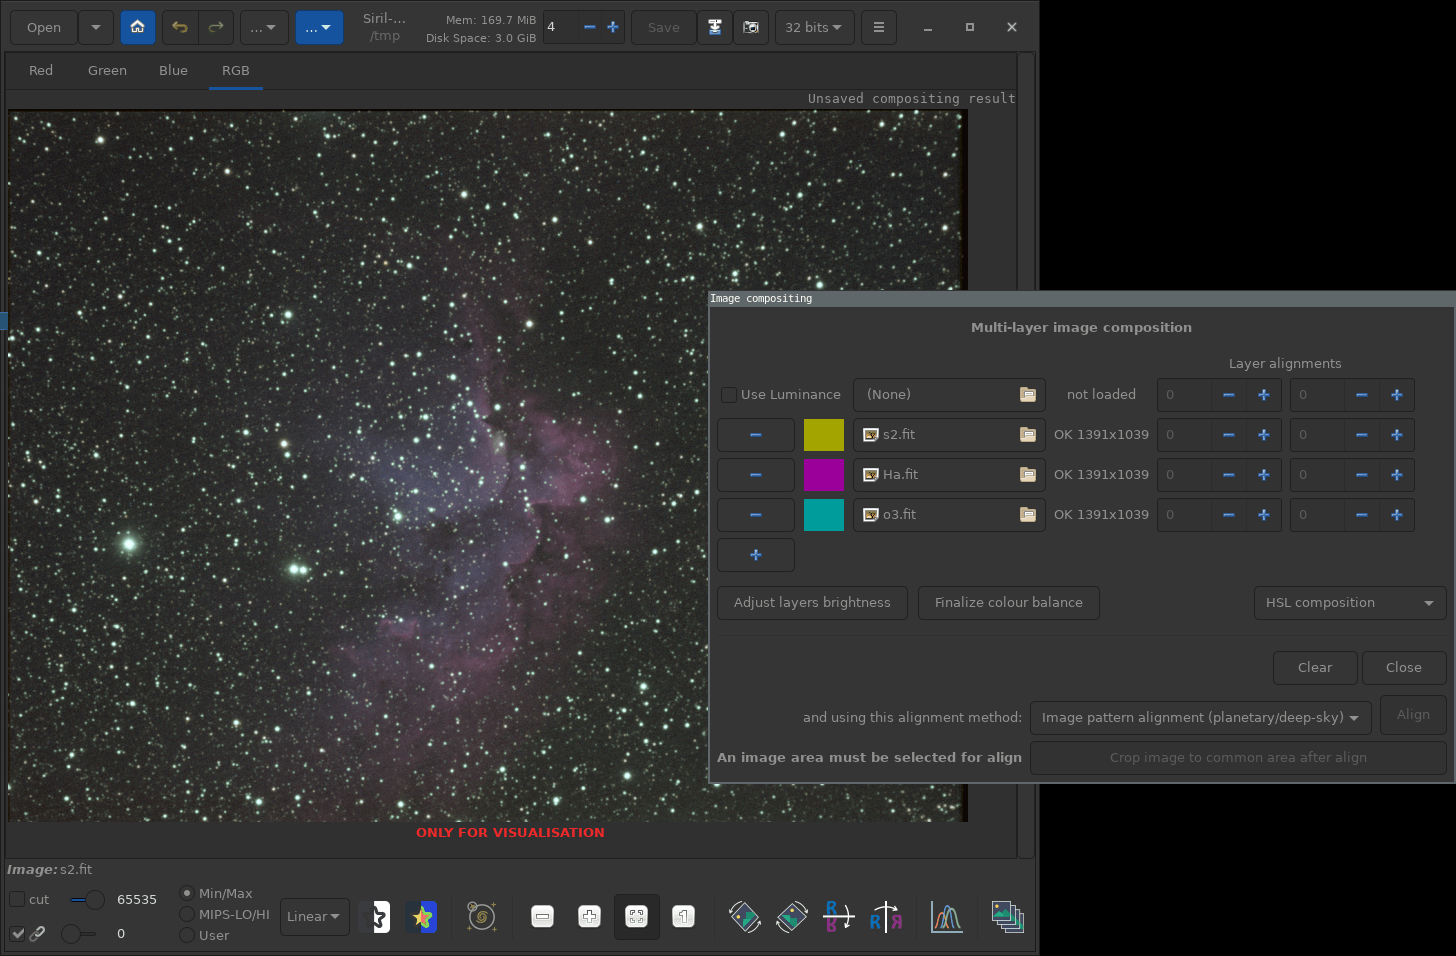
The correct way would have been here to select the half colors from the tool,
if really that was the hues wanted for each image. In fact, after having
selected the full brightness colors as above, clicking on the An alternate non-saturated coloringAdjust layers brightness button will do that automatically, but even better in fact: if the
input images do not use the full dynamic, the tool will detect it and allow a
bit more than the 50% of the brightness to each. That way, we get a
non-saturated image:
Selecting custom colors #
One might be tempted to adjust the ratio of power for a channel depending on the input images. This tool has a rather complex way of dealing with this and we suggest you to use the two other tools to achieve this. But for reference, here is how to do it.
This is done currently by choosing a color that contains this power modulation. For example, to make the O-III image contribute 30% to the green and 100% to the blue, the color associated to the image will have to be exactly that.
Click on the custom + button of the color chooser window you already saw.
This will change the window to a color palette. Unfortunately, the color
chooser that Siril currently uses is generically provided by the graphical
toolkit it uses, and the convention is to use hexadecimal for that, on 8 bits,
so on 256 values. So here, to get my 30% green color, I have to compute 30% of
255 and convert that to hexadecimal, that becomes 64. Many Web design online
tools like this one
can
help you with that. In #0064ff, we have two zeros for the red, 6 and 4 for
the green and the two f for the blue, ff means 255, or 100%.
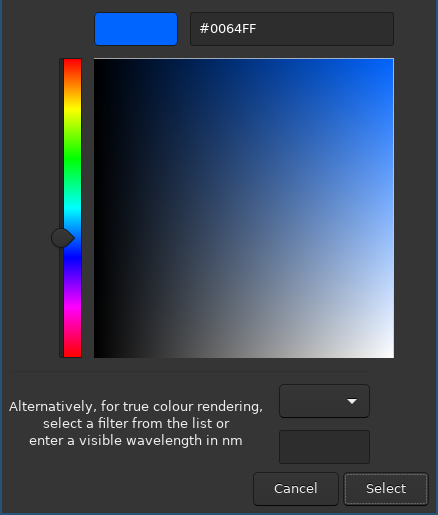
The color selector custom tool uses hexadecimal representation of colors
Note: it is identical to set a green and blue, so cyan, color to an image and to add the image twice, once with a green color and another with a blue color.
After having chosen the hues that you like and the corresponding power to each channel, probably after several iterations, you can continue the processing of your final image. Note that the white balance doesn’t have to be perfect at this step. A background neutralization or color calibration can be used afterwards, or more complex tools.
A composition based on custom colors, not necessarily the best for this set of images
2. Using Pixel Math #
As already presented above, the Pixel Math tool is capable of mixing several images with formulas. Some complex formulas exist, mostly developed for PixInsight which had this tool in the first place. Some operators are different or not available in Siril, but many formulas will still work.
The documentation of the tool will be of great use. It provides the list of functions and operators and explanation on each element of the user interface. The tool can work with monochrome or color images, can use formulas typed in the corresponding fields and adjusted to obtain the desired result, they can also be based on some external parameters that will be adjusted more easily in several formulas or several places in complex formulas, and formulas can be resused from a session to another with presets saving.
The tutorial
shows a basic example of
channel mixing, we will also see that in the section below where the formulas
are used directly inside a script. The graphical version of Pixel Math is a
great tool for color mixing adjustment, with the use of parameters and the
Apply button.
3. Using a script #
In Siril 1.2 we put a lot of effort into exposing the post-processing operations as commands and making the complete image processing workflow automatic. From commands, scripts can be made, as they are simply a list of commands. All operations discussed in this tutorial are available:
- Image registration with the new two-pass global star registration (
registercommand with-2passoption) and framing options to keep only the common area between images, so cropping the dark borders (seqapplyregcommand with-framing=minoption). - Image equalization, with the four presented methods, the
linear_matchcommand, thepmcommand for Pixel Math, theautostretchcommand, and thepcccommand. - Channels mixing can be efficiently be done using the Pixel Math command, see the example below.
- A new
rgbcompcommand that builds a color image from either 3 monochrome (simple RGB) or from a luminance and a color image or also 3 monochrome. - Finalizing color balance is difficult without seeing the image, but
reproducing operations that were made graphically by reusing the same
parameters is possible. This should come as a result of image equalization,
channels mixing, stretch operations (
autostretch,autoghs,asinh,ght…), green removal (rmgreen), color saturation (satu), even star removal (starnet) or synthetization (synthstar)…
Even if Pixel Math is simplified in the command compared to its full graphical
interface, it is possible to use it to normalize images and to mix images to
obtain a color channel in a script. As the rgbcomp RGB image creation command
only copies the input data when no luminance-based composition is done, if more
than 3 input images exist, some channels mixing is required.
For example, if the input images come from Red, Green, Blue and H-Alpha filters,
the final red channel could be obtained by mixing the Red and H-Alpha images.
And Pixel Math as we have seen can do it very easily. Note that images are
referenced in the command version of Pixel Math with their name, surrounded by
the $ chacter. A synthetic luminance image could also be created. This example
script does that, starting from registered and pre-stretched images, creating a
luminance image from Green and H-Alpha, and mixing Red and H-Alpha with a 40/60%
proportion to give the result its red channel, assuming the image names are the
filter names:
pm "$H-Alpha$ * 0.5 + $Green$ * 0.5"
save Luminance
pm "$H-Alpha$ * 0.4 + $Red$ * 0.6"
save New_Red
rgbcomp -lum=Luminance New_Red Green Blue
Stretching and finalizing color balance #
At this stage, the color image should be cropped to remove the black or monochrome areas if any remain. If the photometric color calibration was not used to get to this point (remember it only works for red, green and blue filtered images), the color balance should still be close to the desired tint.
Some usual operations at this stage include histogram stretching , color altering operations like color calibration, color boosting, green tint removal. The new GHS tutorial also covers stretching histogram of color images, including SHO.
Note that the lightness-preserving image processing methods, like some options of the Asinh stretch, GHS, green removal and color saturation, will also change the color saturation or balance in some cases, in ways that will not be recoverable later on. They can wash out the colors of the image, or on the contraty remove brightness to some channels of the images if they are unbalanced, which happens for example with an active H-Alpha region not showing at all in other filters.
For false color renderings, it is particularly important to pay attention to the settings of the Green removal tool as it will often remove some brightness or color saturation to the image. This is even more true if the tool is used to remove the magenta tint by inverting the image to its negative value before and after the application of the tool.
If the color and brightness you want to obtain on the background object (nebula, galaxy…) makes the star completely bloated and saturated, an alternative way of processing images, would be to first separate the stars and the rest of the image, process the background how you like, and reintegrate the stars in a more controlled way. This is now possible with Siril too, using the Starnet interoperability and the Star Recomposition tool. They are both featured in the new Starnet integration tutorial .
Summary #
There are several operations to go through, the order or the need of which depending on the type of color composition being done. All should start with the images registered, cropped, deconvoluted and with the background gradient removed:
- for RGB, no normalization or color balance required, as PCC will manage that. A simple combination of the three images in a color image, PCC then stretching will work.
- for LRGB, the same can be done first for RGB, then remember to pre-stretch
images before doing the luminance-based composition, on luminance and the
color image. The RGB Composition tool will not take the calibrated RGB image
as input, so using the
rgbcompcommand is advised. - for SHO, HOO and the like, it is a good idea to normalize images first, because it’s harder to manage later, depending on what kind of stretching is used. So, normalization, then creating a color image with whichever channel mixing and color affectation you like, then dealing with stretches and color balance.
- for LSHO and the like, I suggest a color image to be created for SHO then after a pre-stretch, combine with L
- for LRGBH, LRGBSHO and other complex mixes, channels mixing will be needed, even for the luminance image probably, like LHO for luminance… A method that seems to be working well to add a single narrow-band filter to an RGB image is Continuum subtraction .