Automated Star Reduction Script
This tutorial will show you how to install and use a Python script that automates your star reduction workflow within Siril. With this script, you can streamline the process of reducing the size of your stars in your astrophotography images and get stunning results in seconds!
Attention: The script requires Siril 1.4.0-beta1 or newer, and StarNet++ CLI installed and configured within Siril. The script also only supports FITS format images, and the image must be in a non-linear (stretched) state.
1. Install the Star Reduction script #
Starting with Siril 1.4.0, you can install new scripts developed by trusted third-party developers and hosted by the Siril team via the Get Scripts option in the Hamburger menu. To access Get Scripts, click on the Hamburger menu at the top right, and choose Get Scripts.
Scroll through the list of scripts, and select the DSA-Star_Reduction.py Python script as shown in the image below by checking the box. Then click on Apply to download and install the script. The script will now appear in the Scripts -> Python Scripts menu.
The script is now accessible in the Scripts menu.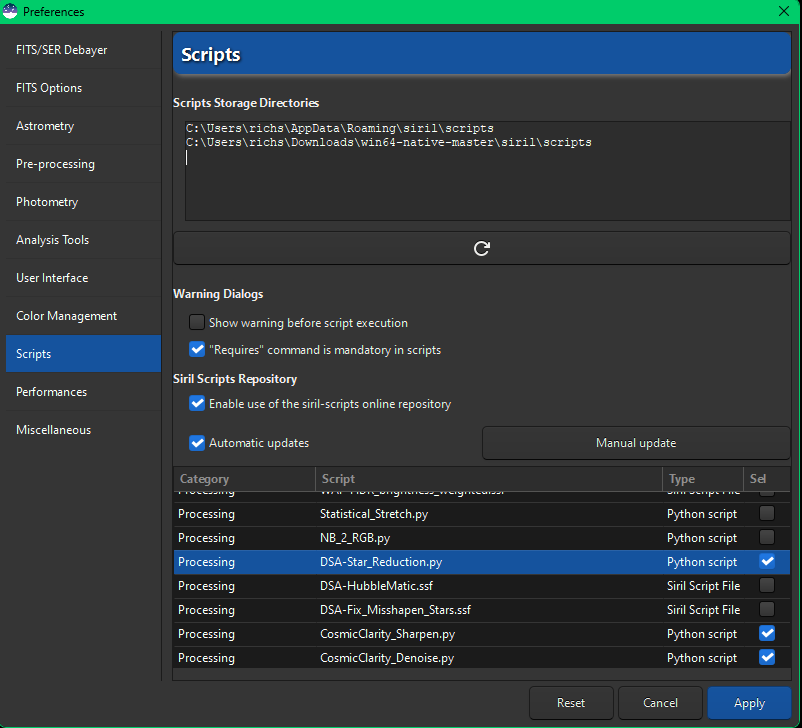
Get Scripts dialog box.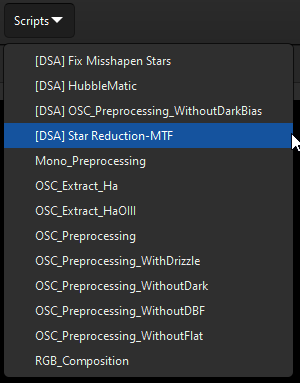
2. Open the image for star reduction #
Open the FITS file you wish to apply star reduction to. There’s no need to set the working directory; the script will automatically set it to the image’s folder. Again, the image must already be stretched. If it’s not, then go ahead and stretch it and make sure to Save before running the script.
3. Run the star reduction script. #
-
Click on the
Scriptsmenu,Python Scripts, and then clickDSA-Star_Reduction.py.
DSA-Star_Reduction in the Scripts menu.
The Value defaults to 0.2 and determines the amount of star reduction to apply. The smaller the number, the smaller the stars will be. A value of 0.5 will have no effect, and a value above 0.5 will increase the star size.
The Overwrite Output File option will overwrite the previously reduced star image if enabled. If this option is disabled, then a new image will be created each time you click the Apply button, and its name suffixed with the Value that you specified.
- Set the desired Value, and click Apply.
The script runs StarNet once to create a starless image. Future star reduction runs will reuse this image, making the process much faster.
After reduction, the image with reduced stars will open automatically. To further adjust star size, simply change the Value and click Apply again.
The final image will be saved in the same folder as the original image, suffixed with _ReducedStars in its filename.