Mosaics
Since Siril 1.4, the new astrometric alignment method enables to create mosaics. This feature can be used for different use cases, whether you need to align frames with little overlap, frames shot with different setups (so different field of view and sampling) and so on. In this tutorial, we will address the two main use cases, that are:
In any case, please remember that processing mosaics is quite memory intensive because both cases deal with either large images (that need to fit in memory) or a large number of images. So more than ever, we recommend having plenty of RAM and images stored on a SSD.
Stacked images mosaics #
This use case was the primarily intended case for developing astrometric alignment. It requires shooting series of images centered about different points of the sky, so as to create for each series a stack. Then all those stacked tiles need aligning together to create a larger image, namely the mosaic.
To make the acquisition, you will need a software that can plan mosaics, such as N.I.N.A . One warning before you plan such sequence: you will need to determine the rotation of your camera so that the tiles align as intended. In the image below, the angle is 176deg and it is used to determine the center coordinates of each image.
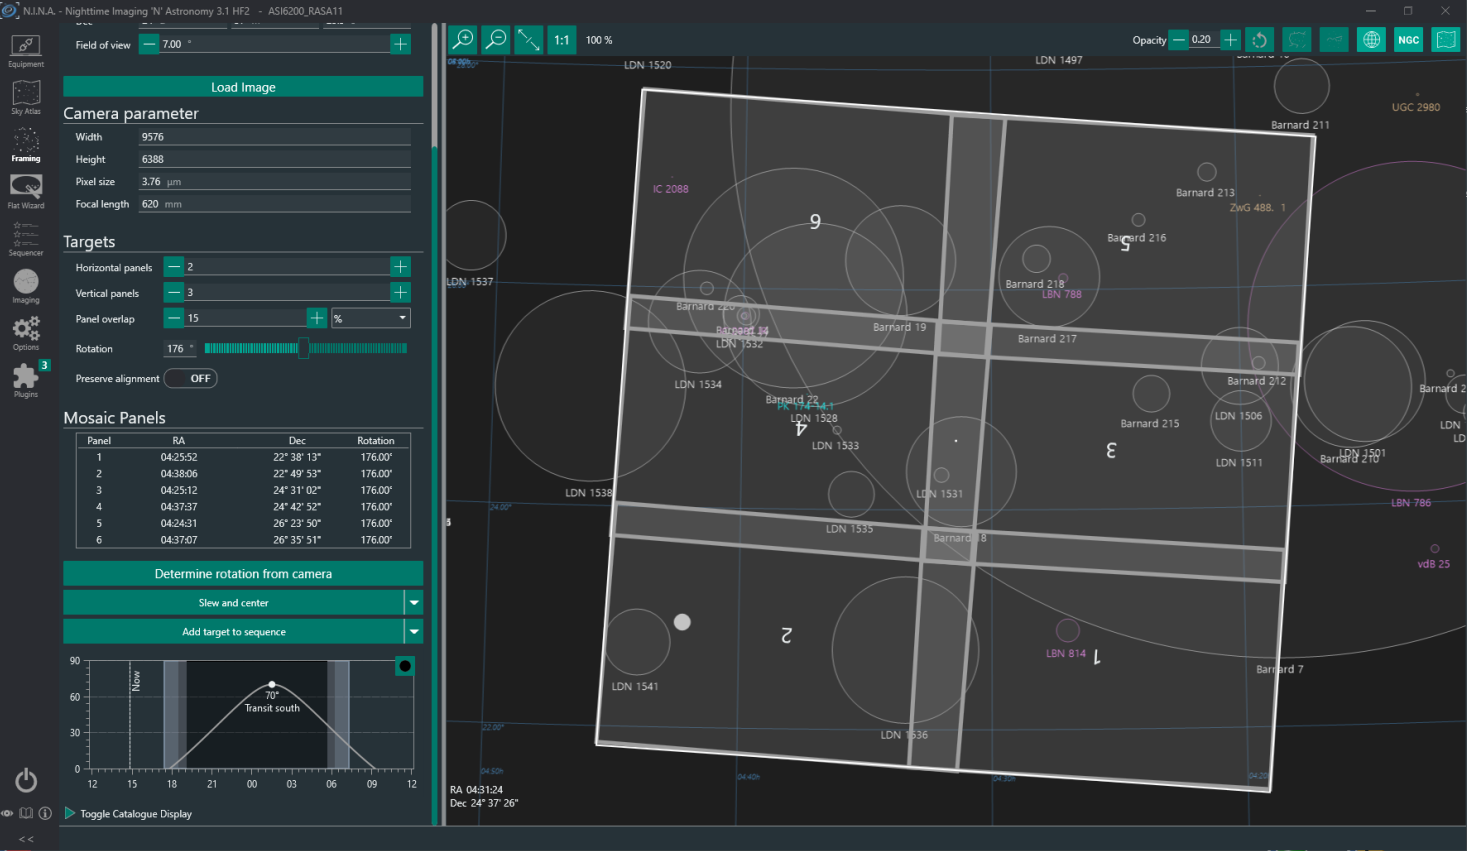
Six-tile mosaic planned in NINA Framing module.
Say you have planned for 30 images per panel, you would then end up with 6x30 = 180 frames.
Once you have shot the 180 images, you will proceed with stacking each panel separately, so by group of 30.
In the example from above, you would get finally 6 stacks of 30 images each, i.e. the panels or tiles.
We won’t detail here the process to obtain such stacks, we assume here you already know your basics.
It is recommended to make a background correction with polynomial of order 1 on the individual frames.
One last piece of advice still. At the alignment step for each series, it is recommended to use Undistortion
so that each tile is as flat as possible.
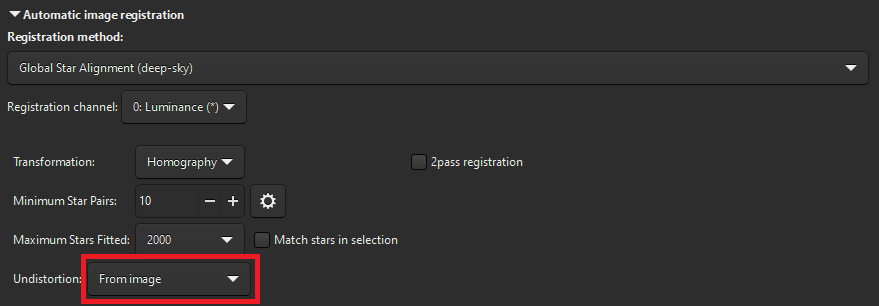
Alignment tab, Undistortion activated.
More information about the different options to undistort can be found in the global registration documentation .
If you already have stacked tiles at hand and haven’t undistorted them because you were using previous versions of Siril, no worries. This can still be done when stitching the panels together.
Ok, so now we have our 6 panels ready:
- create a new sequence with the 6 panels, say
mosaic_ - Open the platesolve GUI though
Tools,Astrometry,Image Plate Solver... - At the bottom of the dialog, tick the
Solve whole sequencecheckbox to reveal further options. - Make sure the
Use as Registration informationbox is ticked. - If you don’t have local catalogues installed
make sure you also tick
Fetch catalog for each image(this box is not visible if you do have local catalogues) - Press
OKto perform the whole sequence platesolving.

Astrometry dialog, astrometric registration.
In the display, all the images should now have a green frame, indicating that an astrometric registration information is present.
Now go to the Registration tab:
- Select
Apply Existing Registrationmethod in the top combo. - Select framing method as
maximum - Click on the
Estimatebutton just below. It will tell you what is the expected final size of the mosaic. While this step is not strictly necessary, it helps dealing with a current restriction of Siril 1.4, that cannot display images that are more than 32768 pixels in width or height. Fixing this will be addressed in another release as it requires changing a lot of internal code with the current display library.
In case the final image ends up being too large for the display, a warning box will open.
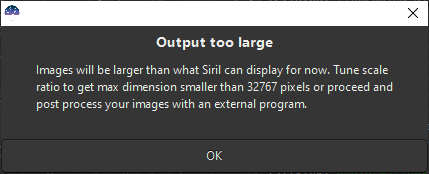
Warning that final image is not displayable in Siril.
If that is the case, either you can proceed but you will need to use another software for processing steps.
Or you can play with the scale parameter in the Registration tab to reduce the final image size.
Press again Estimate, which also accounts for the scale, to check that the result will be within displayable
limits.

Final size estimation.
Once you have checked the output size, you can proceed by pressing Go register and
then move on to the Stacking tab. The images will now have different sizes as the
registration with maximum framing has rotated then as required so that the tiles
overlap correctly. You will also see a blue frame on the images display, meaning that
there are still shifts remaining between the images.
In the stacking tab, Maximize framing should be selected, which is the consequence
of images having different sizes. Choose the following options:
Average stacking with rejectionMethodAdditive with scalingNormalizationNo rejectionand Weighing toNone
Then, for the stack stitching options, you can pick:
- a distance in pixels to feather the images
Normalize on overlapsto compute normalization factors on overlaps areas instead of whole images.
The feathering distance is the distance over which each image will be feathered before being added to the final mosaic image. This prevents seeing sharp edges on each tile borders.
The Normalize-on-overlaps feature will compute coefficients to correct differences in scale/offset on
the images overlaps instead of whole images. This is particularly important if some tiles have mainly
nebulosities and other mainly black-sky with stars.
This normalization is based on a modified version of the paper by
Brown, M., & Lowe, D. G. (2007). Automatic panoramic image stitching using
invariant features. International journal of computer vision, 74, 59-73.
More details on the modifications are documented in
Siril contributors documentation
.
The feathering distance and the choice to normalize (or not) on overlaps will very much depend on your data, so do not hesitate to experiment.
You can then press the Start stacking button. And voila!
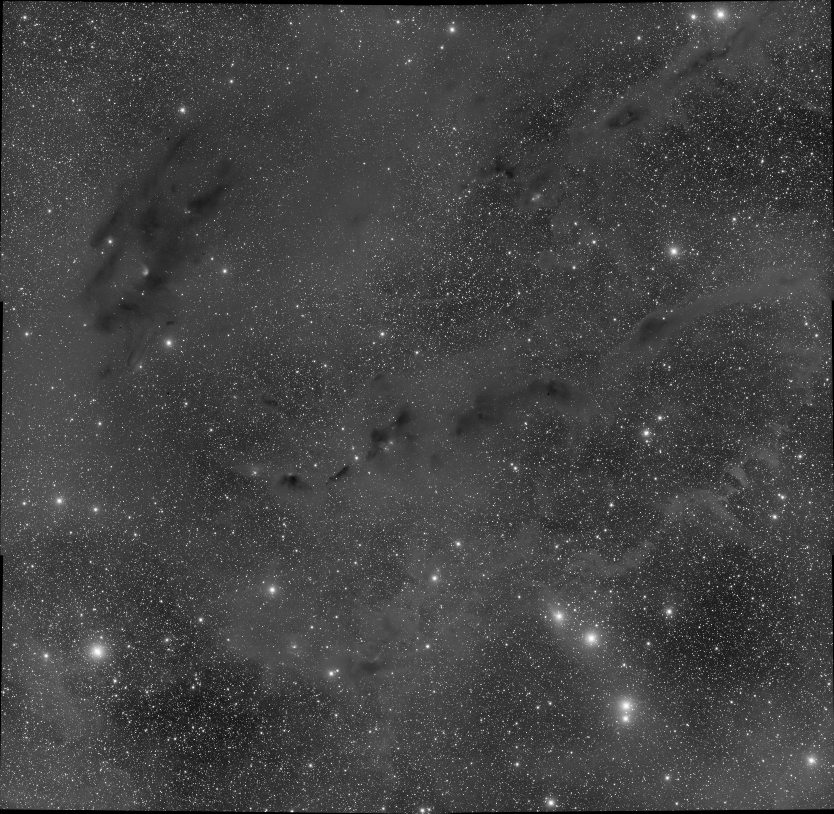
Final mosaic, Autostretch view
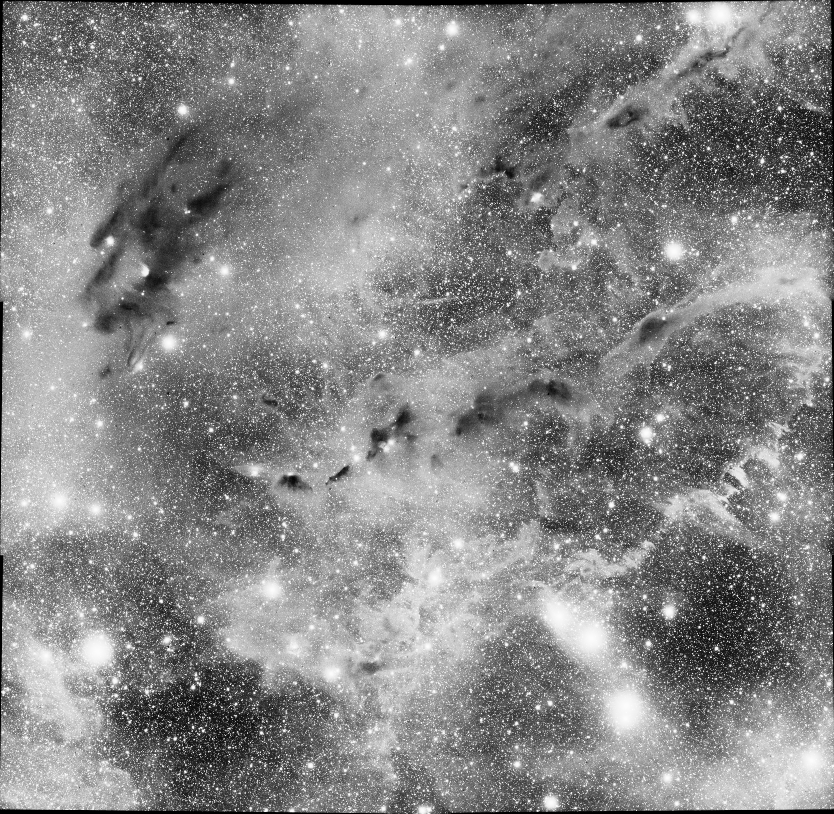
Final mosaic, Histogram view
Images above courtesy of G.Attard.
One final word on mosaics done with mono cameras and filters. It is recommended first to
assemble each mosaic per layer and then to create a sequence with all the layers to recompose the color.
This will be less resource-intensive than to recompose a color image per tile and to stitch them together.
Smart-telescope mosaic mode #
Those telescopes becoming increasingly popular, we also wanted to cover this use case in the tutorial, even though the mosaic stitching feature was not primarily intended to do this.
Caution: The FITSEQ mode, which allows processing more than 2048 images under Windows, does not allow astrometry to be performed on the entire sequence!
One recommendation before you give it a shot, please make sure you have the local catalogues installed
. This will be important to ensure most of the images of the sequence
are correctly solved. For some images, the header may provide center coordinates which are not accurate,
and you may need to use Siril near solver, only available with local catalogues installed.
It will also be a lot faster as it does not require to fetch a catalogue online
for each image (and it also much nicer not to overload the servers with thousands of queries).
Let’s jump in. We start assuming that you have a created a sequence with your frames.
If your telescope produces calibration frames, you have two choices:
- If you want to use RGB drizzle, do not debayer your frames at the calibration step.
- If you prefer to use Interpolation, you will need to debayer the frames during calibration.
If you don’t have calibration frames, same choices:
- If you want to use RGB drizzle, you can jump to the next step, no need to debayer.
- If you prefer to use Interpolation, you will need to debayer the frames by typing the command:
calibrate . -debayer
My recommandation is to prefer Interpolation for this type of workflow. RGB drizzle is very memory-intensive and longer to run, in particular on this type of sequence with hundreds or thousands of images, with marginal benefit if not none on the final resolution.
We’ll register the whole sequence using platesolving:
- Open the platesolve GUI though
Tools,Astrometry,Image Plate Solver... - At the bottom of the dialog, tick the
Solve whole sequencecheckbox to reveal further options. - Make sure the
Use as Registration informationbox is ticked. - If you don’t have local catalogues installed
make sure you also tick
Fetch catalog for each image - Make sure you untick the
disable near searchbox, this will allow a near search , i.e. looking in the vicinity of the coordinates if the initial coordinates are a bit off - Press
OKto perform the whole sequence platesolving.
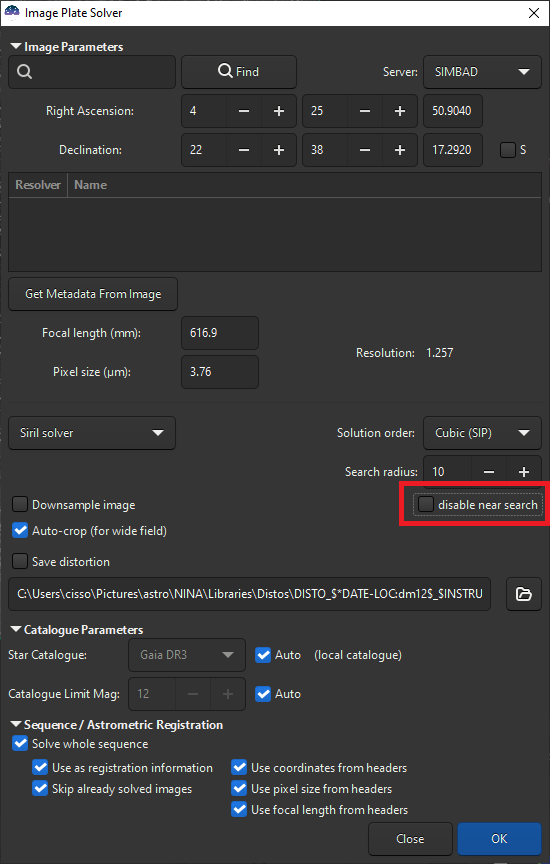
Astrometry dialog, astrometric registration with near solve enabled.
Now go to the Registration tab:
- Select
Apply Existing Registrationmethod in the top combo. - Select framing method as
maximum
You can add filters in the Image Selection area (if some images were not platesolved, the Selected filter should be on).
However, avoid to be too restrictive with the filters on FWHM or roundness or else. Otherwise, you may end up with holes or noisier zones in your final image.
Depending on if your frames are debayered or not, you will only have access to the Use interpolation or Use drizzle tab at the bottom. If you use drizzle,
or RGB-drizzle how it’s sometimes called, keep the scale to 1.
Now press Go register to effectively register the sequence.
In the stacking tab, Maximize framing should be selected, which is the consequence
of images having different sizes. Choose the following options:
Average stacking with rejectionMethodAdditive with scalingNormalization- Select a rejection method like
Winsorized Sigma ClippingorGESDT
Then, for the stack stitching options:
- In most cases, feathering will be not necessary, as you will have lots of images overlapping and borders should be rejected by the rejection algorithm.
- DO NOT CHECK
Normalize on overlaps. This would be extremely long (overlaps are computed by forming all the possible pairs of images) and unnecessary.
You can also pick Output normalization and RGB equalization and then press Start stacking.
And with some patience, you should finally get a mosaic image!